This article was originally published on the previous Kolarclub website on 1 April 2025. It was transferred here on 22 July 2026 and revised to follow Hetzner’s current recovery flow and safer SSH practices.
If you have lost access to a Linux VPS because of a forgotten password, a missing SSH key, or a broken SSH configuration, a rescue environment can give you temporary administrative access to the server’s disks.
This guide uses Hetzner Cloud terminology, but the general mount and chroot process applies to many providers.
Rescue access is powerful enough to modify the entire installed system. Take a snapshot or backup first when the provider offers one, and double-check every disk and partition name before running a command.
Try the Simple Recovery Options First
Before booting Rescue Mode:
- Check whether the provider offers a web console or VNC console.
- Check whether you can reset the root password directly from the provider dashboard.
- If one SSH key stopped working, try another authorized administrative account.
Hetzner Cloud provides a Reset Root Password option under the server’s Rescue menu. If a password reset is all you need and the installed SSH configuration permits password login, that is the shortest path.
If those options do not restore access, continue with Rescue Mode.
1. Enable Rescue Mode
In Hetzner Console:
- Open the server.
- Select Rescue.
- Choose the
linux64rescue system. - Prefer an existing SSH key for authentication.
- Select Enable rescue & power cycle to restart directly into the rescue environment.
If you choose Enable rescue without a power cycle, restart the server manually within the activation window. The rescue system is loaded over the network and does not replace the operating system on your disk.
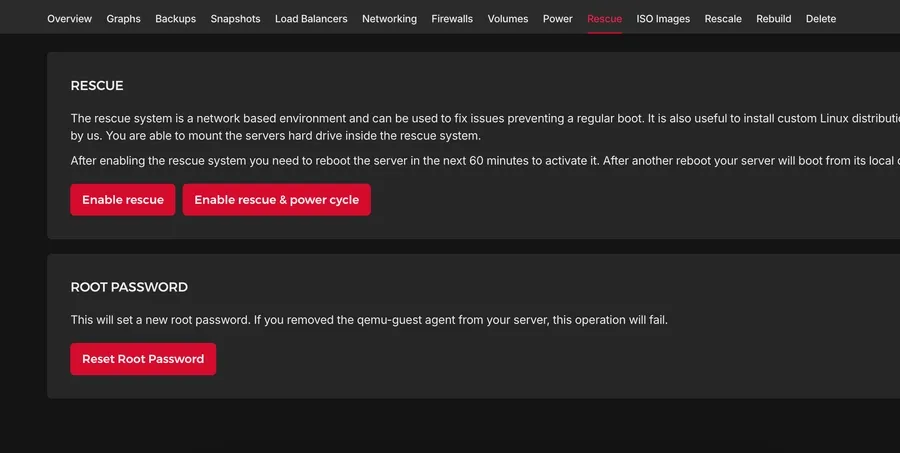
The Rescue section in Hetzner Console.
2. Connect over SSH
Connect as the rescue system’s root user:
ssh root@203.0.113.10Replace the example IP with your server’s actual address.
The rescue environment has a different SSH host key from the installed system, so SSH may show:
WARNING: REMOTE HOST IDENTIFICATION HAS CHANGED!Confirm in the provider dashboard that the server really booted into Rescue Mode before removing the old local key:
ssh-keygen -R 203.0.113.10Do not ignore this warning when you did not intentionally change the server environment; it can also indicate a man-in-the-middle attack.
3. Identify the Root Filesystem
List the block devices and filesystems:
lsblk -fA simple server may use a partition such as /dev/sda1 or /dev/nvme0n1p1. Servers using LVM, software RAID, or disk encryption need additional steps, and the root filesystem may appear under /dev/mapper or /dev/md*.
Do not guess. Identify the filesystem that contains the installed system’s root directory.
4. Mount the Installed System
For a simple layout, replace /dev/sda1 with the correct root device:
mount /dev/sda1 /mntCheck that it looks like a Linux root filesystem:
ls /mntYou should see directories such as etc, home, root, usr, and var.
Hetzner’s rescue environment includes a helper that prepares the required bind mounts:
chroot-prepare /mnt
chroot /mnt
On another provider, prepare the chroot manually:
mount --bind /dev /mnt/dev
mount --bind /proc /mnt/proc
mount --bind /sys /mnt/sys
mount --bind /run /mnt/run
chroot /mnt
You are now operating inside the installed system as root.
5. Restore Access
Choose the recovery method that matches your normal security setup.
Option A: Add an SSH Public Key
Key-based access is preferable when the server normally has password authentication disabled.
install -d -m 700 /root/.ssh
nano /root/.ssh/authorized_keys
chmod 600 /root/.ssh/authorized_keys
chown -R root:root /root/.ssh
Paste only your public key into authorized_keys. Never copy a private key to the server.
If you normally sign in as a non-root user, update that user’s authorized_keys file instead and preserve the correct ownership.
Option B: Reset the Root Password
To set a new root password:
passwdThis changes the password, but it does not automatically enable password authentication in SSH.
Avoid permanently setting both PermitRootLogin yes and PasswordAuthentication yes just to recover access. Modern systems often disable root password login deliberately to reduce brute-force risk. If you temporarily enable it because no key-based option is available, restrict network access where possible and restore the secure settings immediately after recovery.
6. Check the SSH Configuration
If the key or password is correct but SSH still fails, inspect:
nano /etc/ssh/sshd_configAlso check included configuration files:
ls /etc/ssh/sshd_config.dFor key-based root access, a common setting is:
PermitRootLogin prohibit-password
PubkeyAuthentication yes
Validate the configuration if sshd is available in the chroot:
sshd -tFix any reported error before rebooting.
7. Exit and Reboot
Leave the installed system:
exit
sync
If you made manual bind mounts, unmount them in reverse order:
umount /mnt/run
umount /mnt/sys
umount /mnt/proc
umount /mnt/dev
umount /mnt
Then reboot:
rebootThe next boot should use the operating system on disk. If your provider keeps Rescue Mode enabled for more than one boot, disable it in the dashboard first.
8. Verify and Secure the Server
After the server starts normally:
- Reconnect and verify the new key or password.
- Remove any temporary password-login setting.
- Remove keys you no longer trust.
- Review
/var/log/auth.logor the distribution’s authentication journal for unexpected attempts. - Store a tested recovery key and an offline backup somewhere safe.
The official references are Hetzner’s guides for using the Rescue System and resetting a password.